
I recently moved into an old house which will surely become the subject of many blog posts on fun tinkering and gadgetry. But first…
One night, while quietly minding my own business, I heard a ruckus upstairs. Realizing I had neither pets nor an upstairs, I let out the exasperated sigh of, “Well, I suppose I know what my next project is.”

But I needed to know two things:
- How does this “friend” get in (and, hopefully, out)?
- How big and scary?
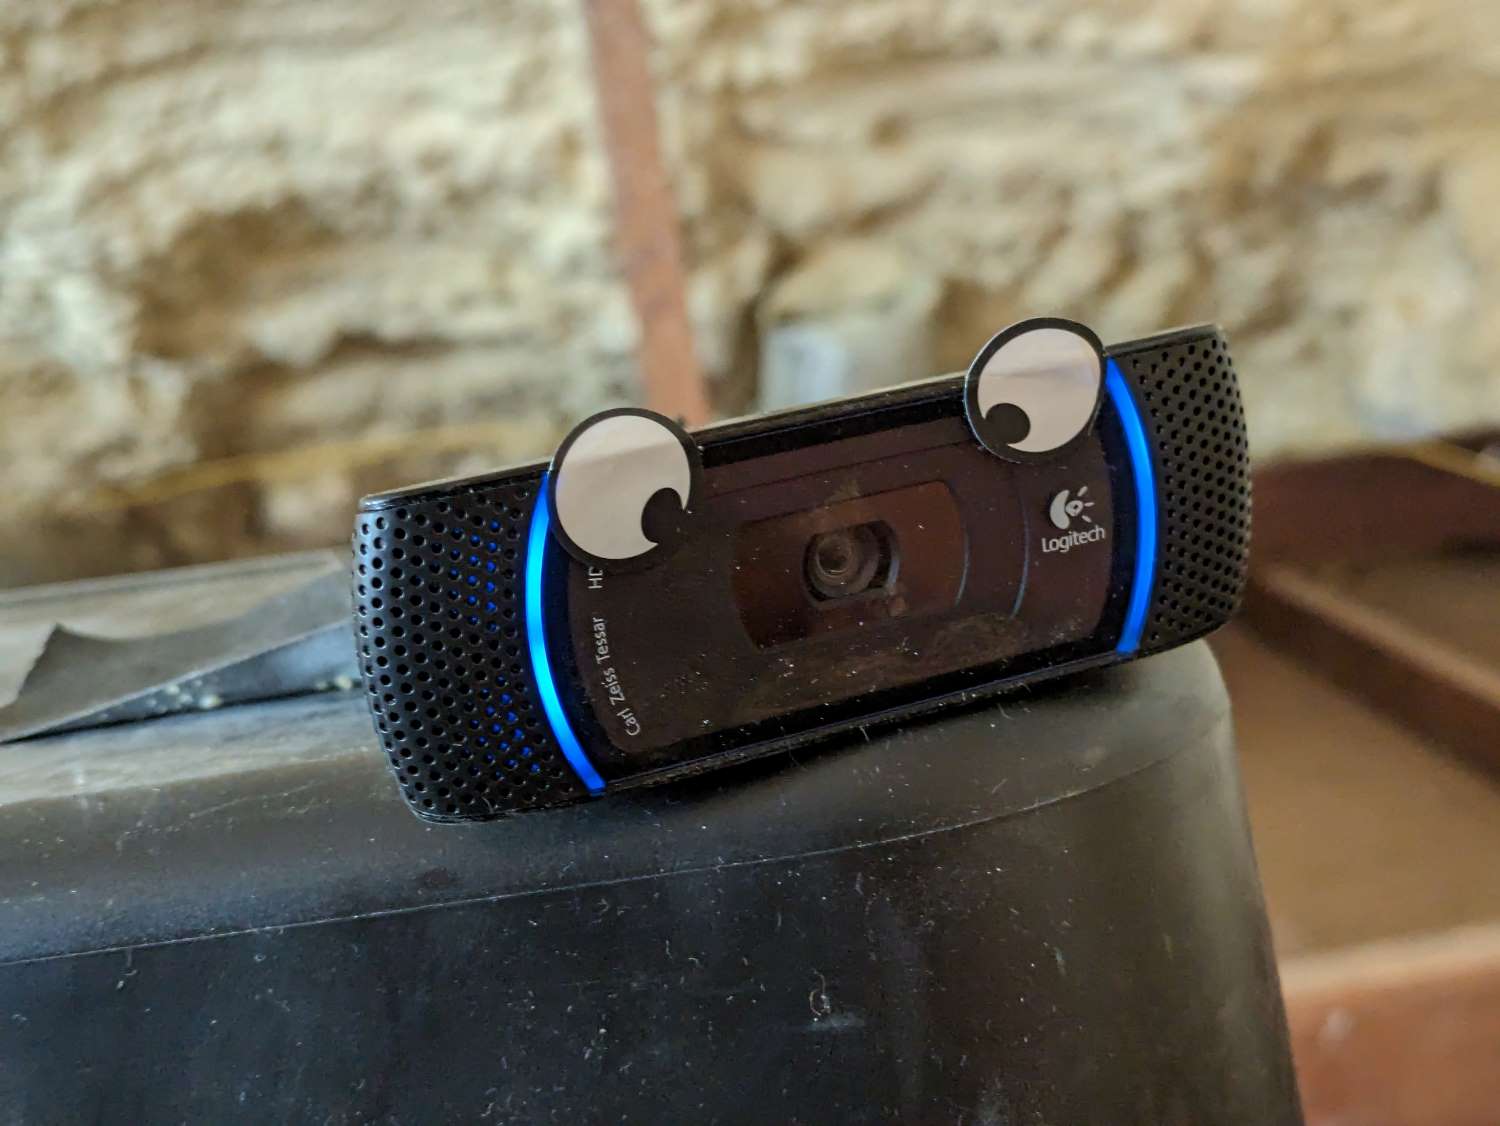
I didn’t see anything obvious in the attic when I went up there. But being only halfway unpacked, I had an old computer and conference room webcam in an easy-to-reach box. I wondered if I could use these to alert me when uninvited guests arrive — and maybe even figure out how they get in. A “game camera,” essentially.
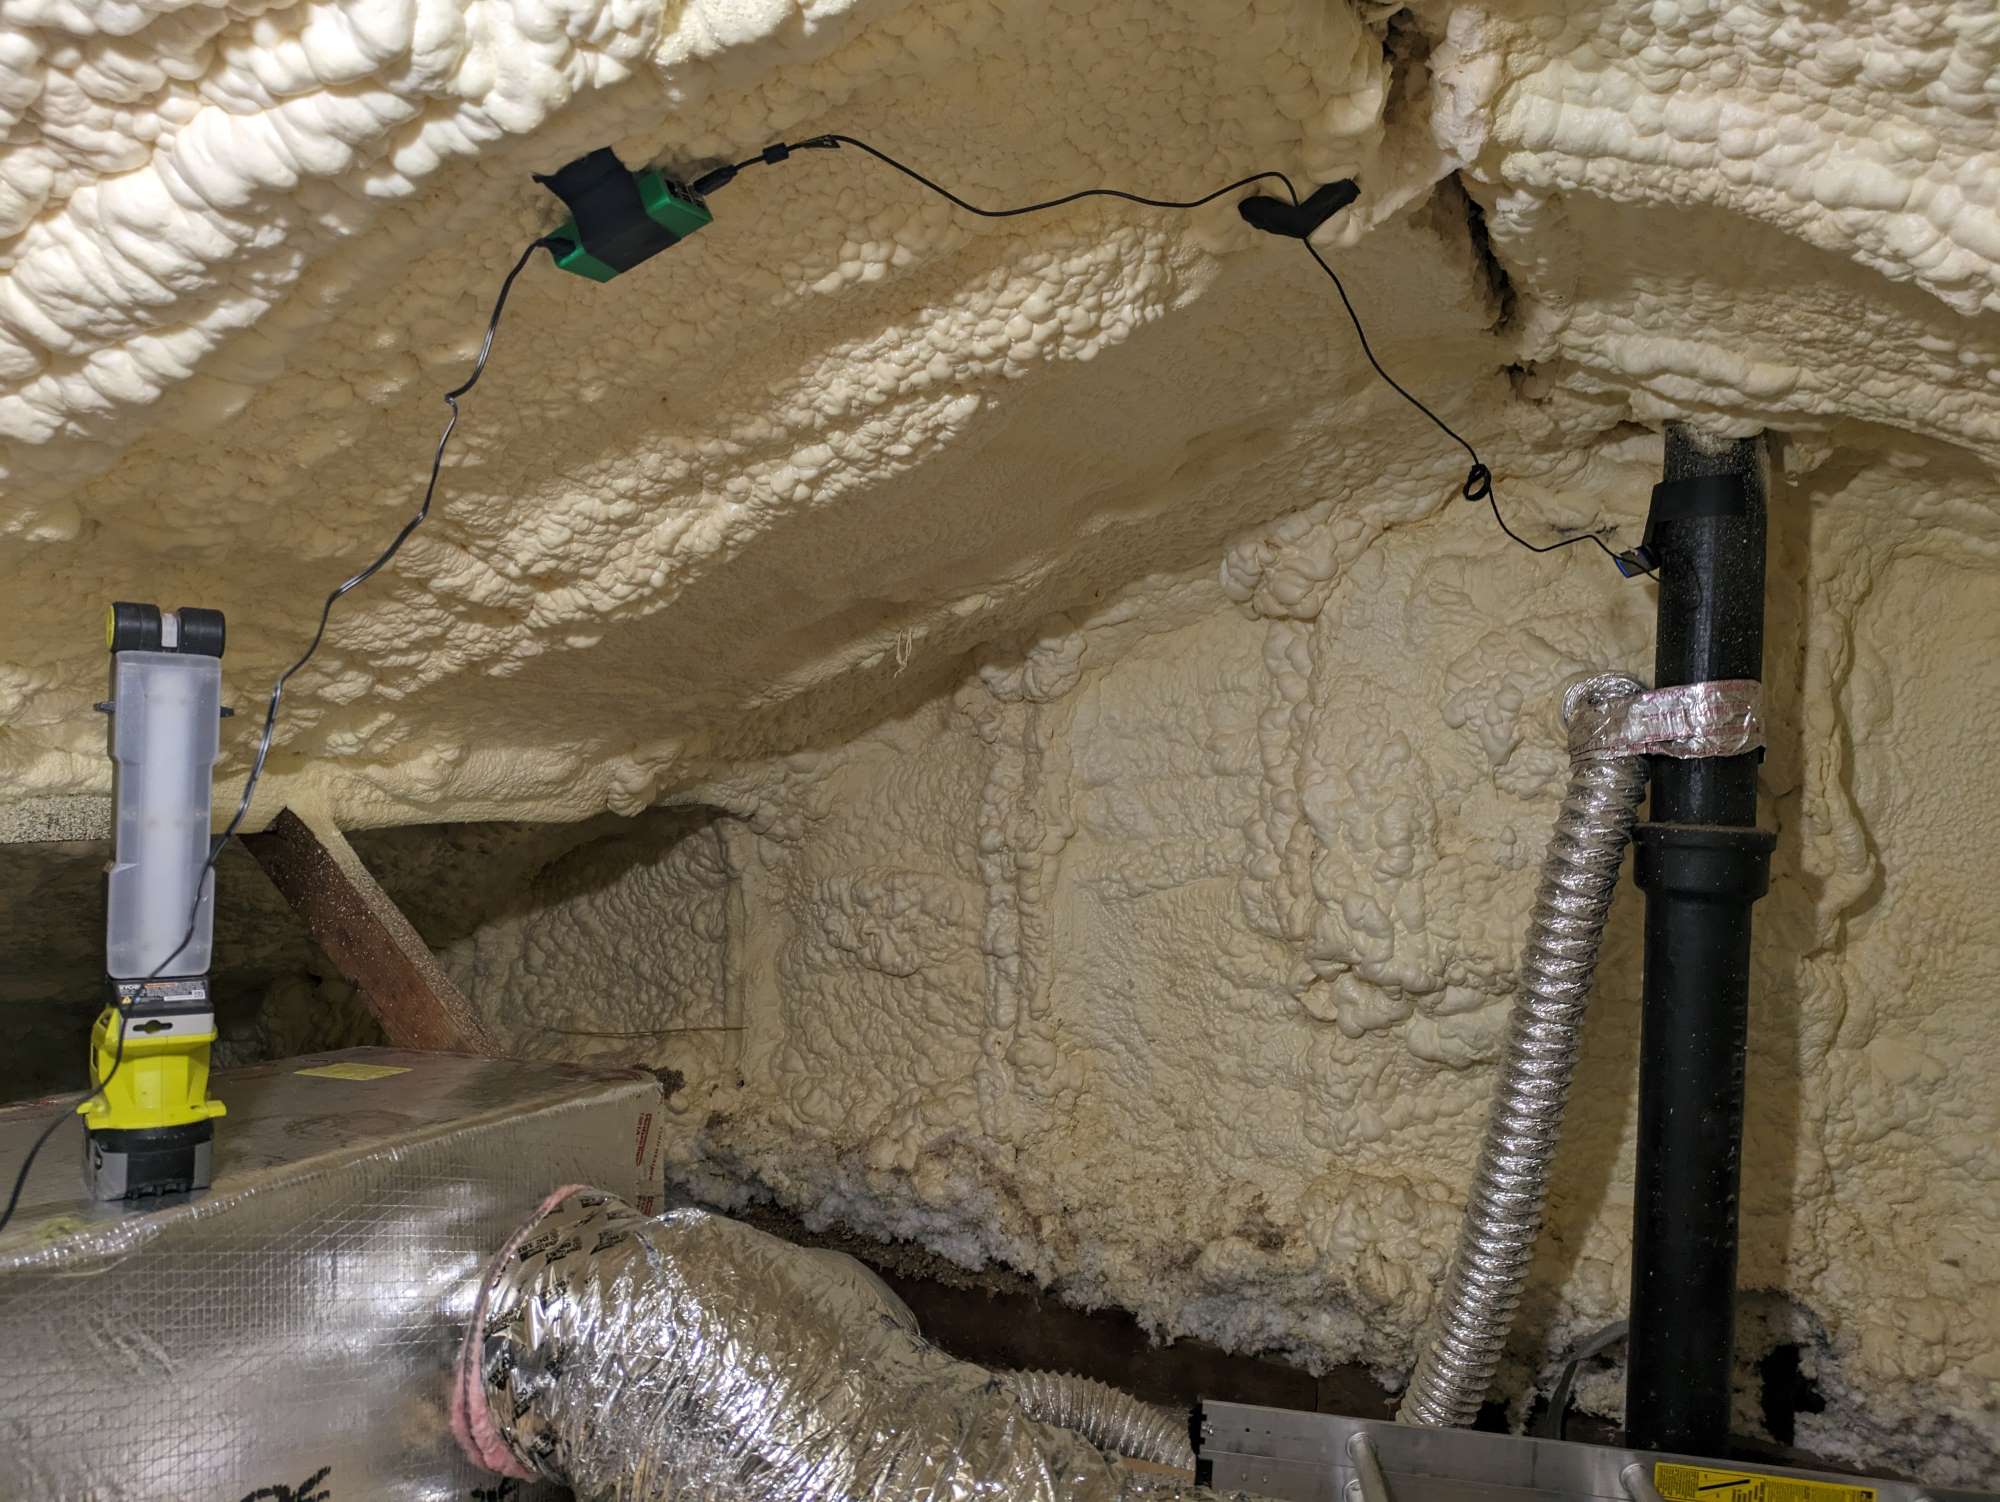
First deployment: Raspberry Pi taped to the roof and the camera taped to the sewer vent pipe over the bathroom ceiling.
System Overview
I used a Raspberry Pi (3rd Gen, Model B) running Motion and integrated it with Home Assistant (which powers all my home automation gizmos) and Cloudflare Stream (for easy video storage/playback).
Uploading video clips to Stream is a convenience feature not really necessary for my mission, but I’m the Product Manager for Stream and this may make a funny story for the office.
Here’s what it does:
- When Motion detects movement in the camera’s view, it starts recording. It also sends a webhook to Home Assistant, which triggers that to notify my phone that we’ve been boarded.
- When Motion stops seeing movement, it will end the recording. When the video
is saved locally, Motion calls a script I wrote to:
- Upload the video to Cloudflare Stream.
- Send the video link to Home Assistant.
- Home Assistant then sends the link to my phone as an actionable notification and adds it to a list.
  flowchart TD

  R(Mysterious Creature) --> |runs in front of the carefully placed| Webcam

  subgraph RPi
    Webcam --> |which is monitored by | Motion
    Motion -.-> |when movement is detected| estart(on_event_start)
    Motion -..-> |when recording concludes| mend(on_movie_end)

    mend --> |executes| script(video-uploader.js)
  end

  estart ----> |script sends webhook to| wh1
  script --> |upload recording to| CF(Cloudflare Stream)
  CF -.-> |responds with video ID| script

  script ----> |sends video link via webhook to| wh2

  subgraph hass [Home Assistant]
    wh1(Motion Detected Automation) ----> |pass message to| Notify
    wh2(Video Captured Automation) --> |pass link to| Notify
    wh2 --> |save link to| todo(List)
    Notify --> |fire an alert to| Phone
  end
Camera and Software
Previously, this webcam monitored my 3D printer. I looked at how OctoPrint handles video for that, which pointed me to projects like mjpg-streamer and camera-streamer. But OctoPrint’s use-case is to record a print start-to-finish or show the printer’s current state on-demand. Not ideal; I need to know when something happens.
Ultimately, I stumbled on a tutorial that introduced me to Motion, which can stream the raw video via MJPEG, detect movement, trigger scripts, and save video clips of just the movement (instead of giving me one long-running video to search through).
Integrations
As noted, there are three ways I integrate with Motion:
- “What’s up there right now?” — Motion as a video source in Home Assistant with its “Motion JPEG” video stream
- “Intruder alert!” — Motion → Home Assistant via webhook when movement is detected
- “How did they get in?” — Motion → Stream and Home Assistant when a new video is captured
What’s up there now? Watching the MJPEG in Home Assistant
Motion will start a “Motion JPEG” live stream by default, but it needs to be
configured to allow access from other hosts. See Motion’s docs on
Live Stream options
for full details, but change this in /etc/motion/motion.conf
# Restrict stream connections to the localhost.
stream_localhost off
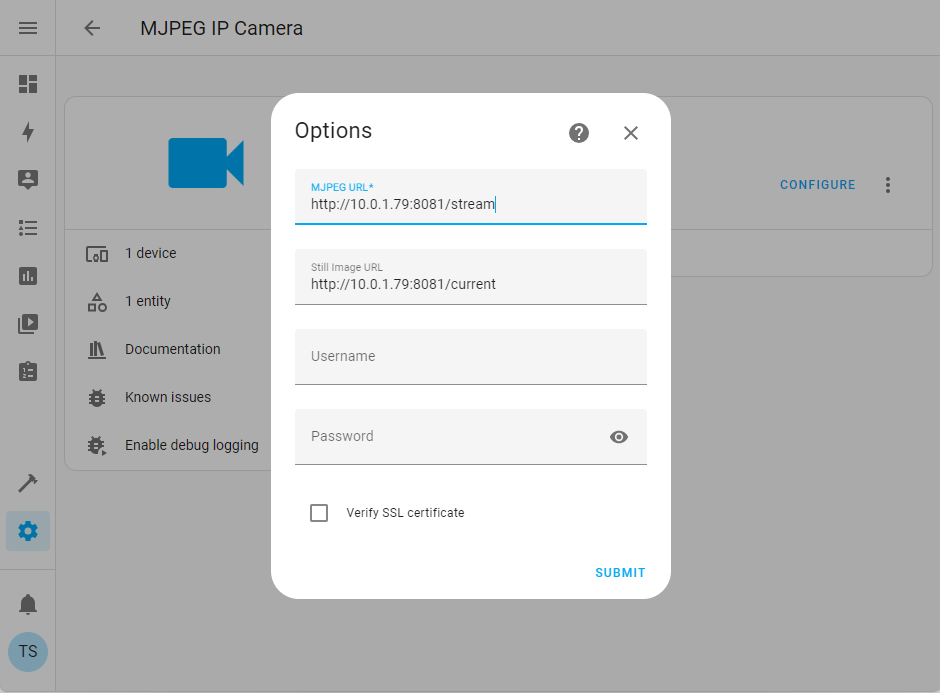
In Home Assistant, add an “MJPEG IP Camera”
and point it to the computer running Motion, port 8081 by default. The /stream
endpoint is the video, the /current endpoint will return a still image on request.
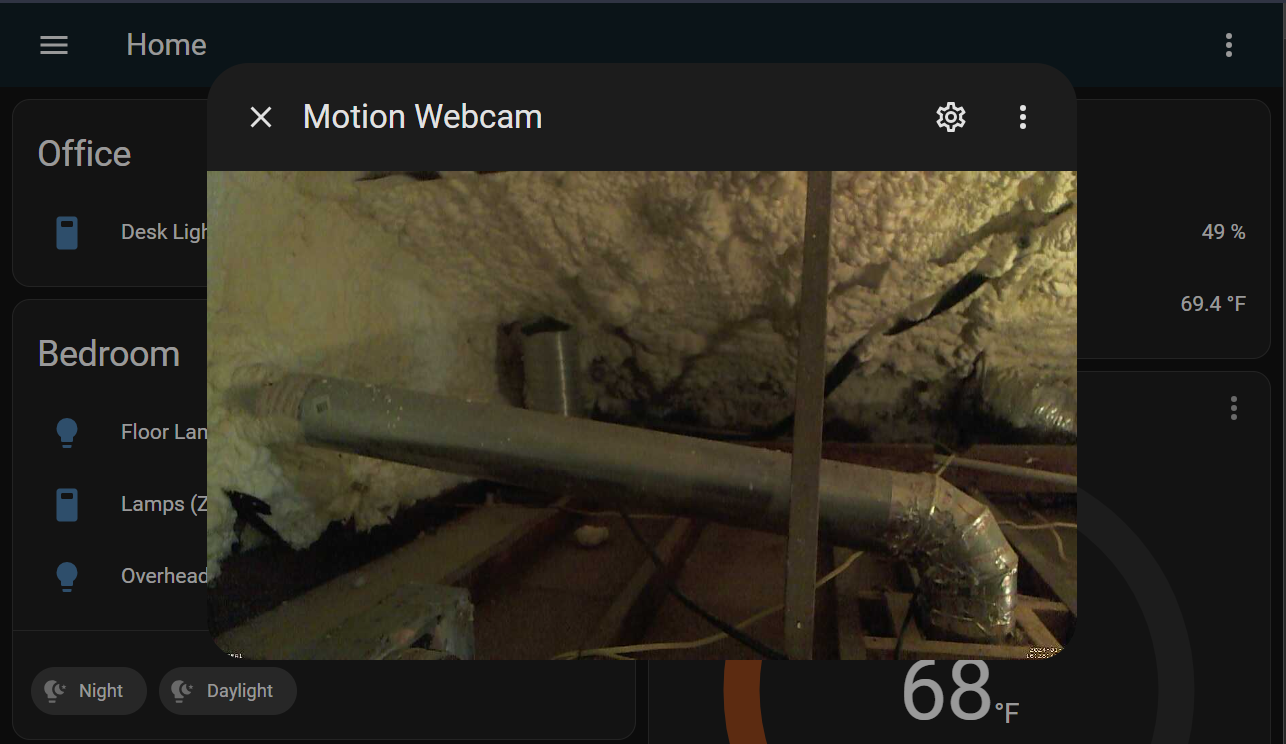
The camera will display a static image on the overview. Click on it to open a live view.
Intruder Alert! Triggering a Notification with a Webhook
Motion allows running commands on various events. Home Assistant allows webhooks to trigger automations. Great combo.
Gotcha: There are two relevant hooks in Motion,
on_motion_detected
and on_event_start.
The “motion detected” hook will fire on every video frame with movement,
potentially dozens of times per second! My use-case is better suited to the
“event start” hook instead, which is also when Motion starts recording.
This is a simple cURL command in Motion’s config:
on_event_start curl -X POST -H "Content-Type: application/json" -d '{ "message": "Motion Detected" }' https://home-assistant.server/api/webhook/motion
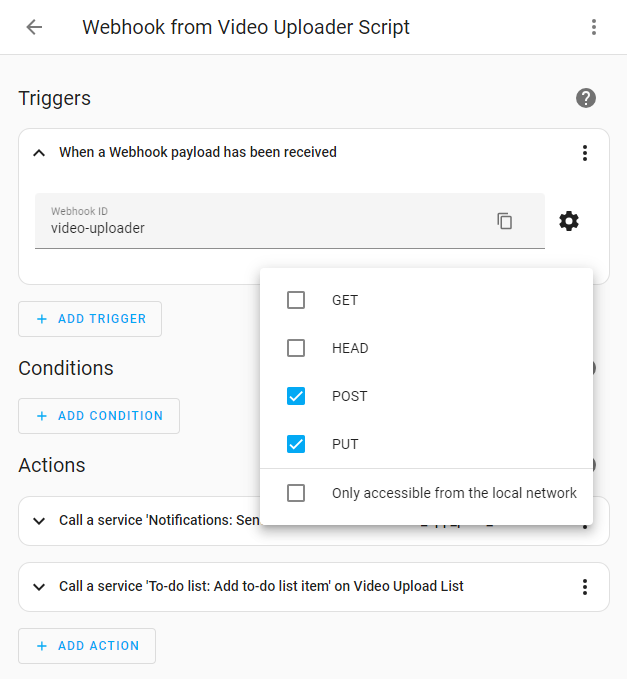
In Home Assistant, an inbound webhook is just an automation trigger type. Create a new automation and create a new “Webhook” trigger:
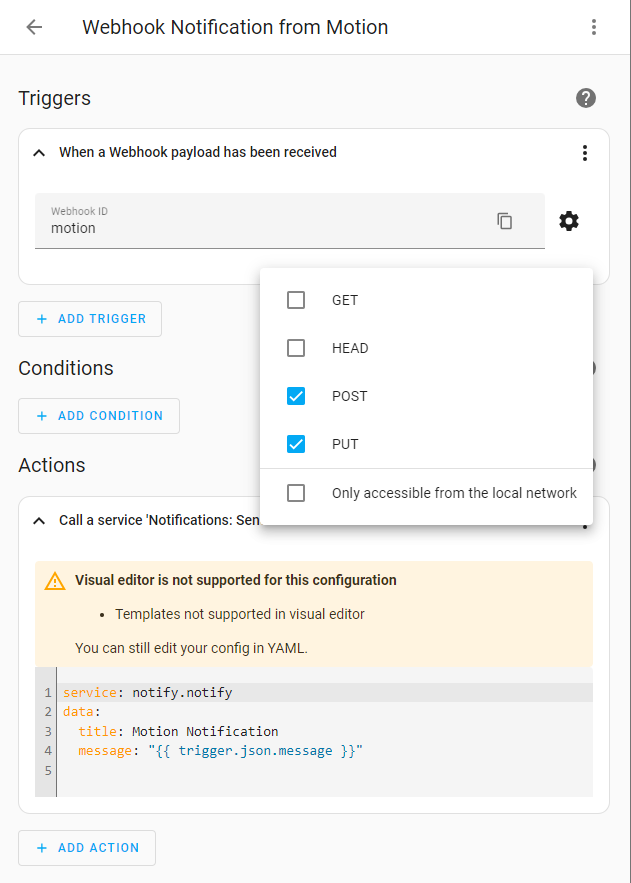
- The “Webhook ID” becomes part of the URL, at
//home-assistant.server/api/webhook/WEBHOOK_ID. - By default, webhooks are only allowed from local networks; uncheck that box if necessary. My Home Assistant server runs in a Docker container, so even the home network is “external.” (Beware the security implications of allowing webhooks from the public internet, particularly if it accepts input!)
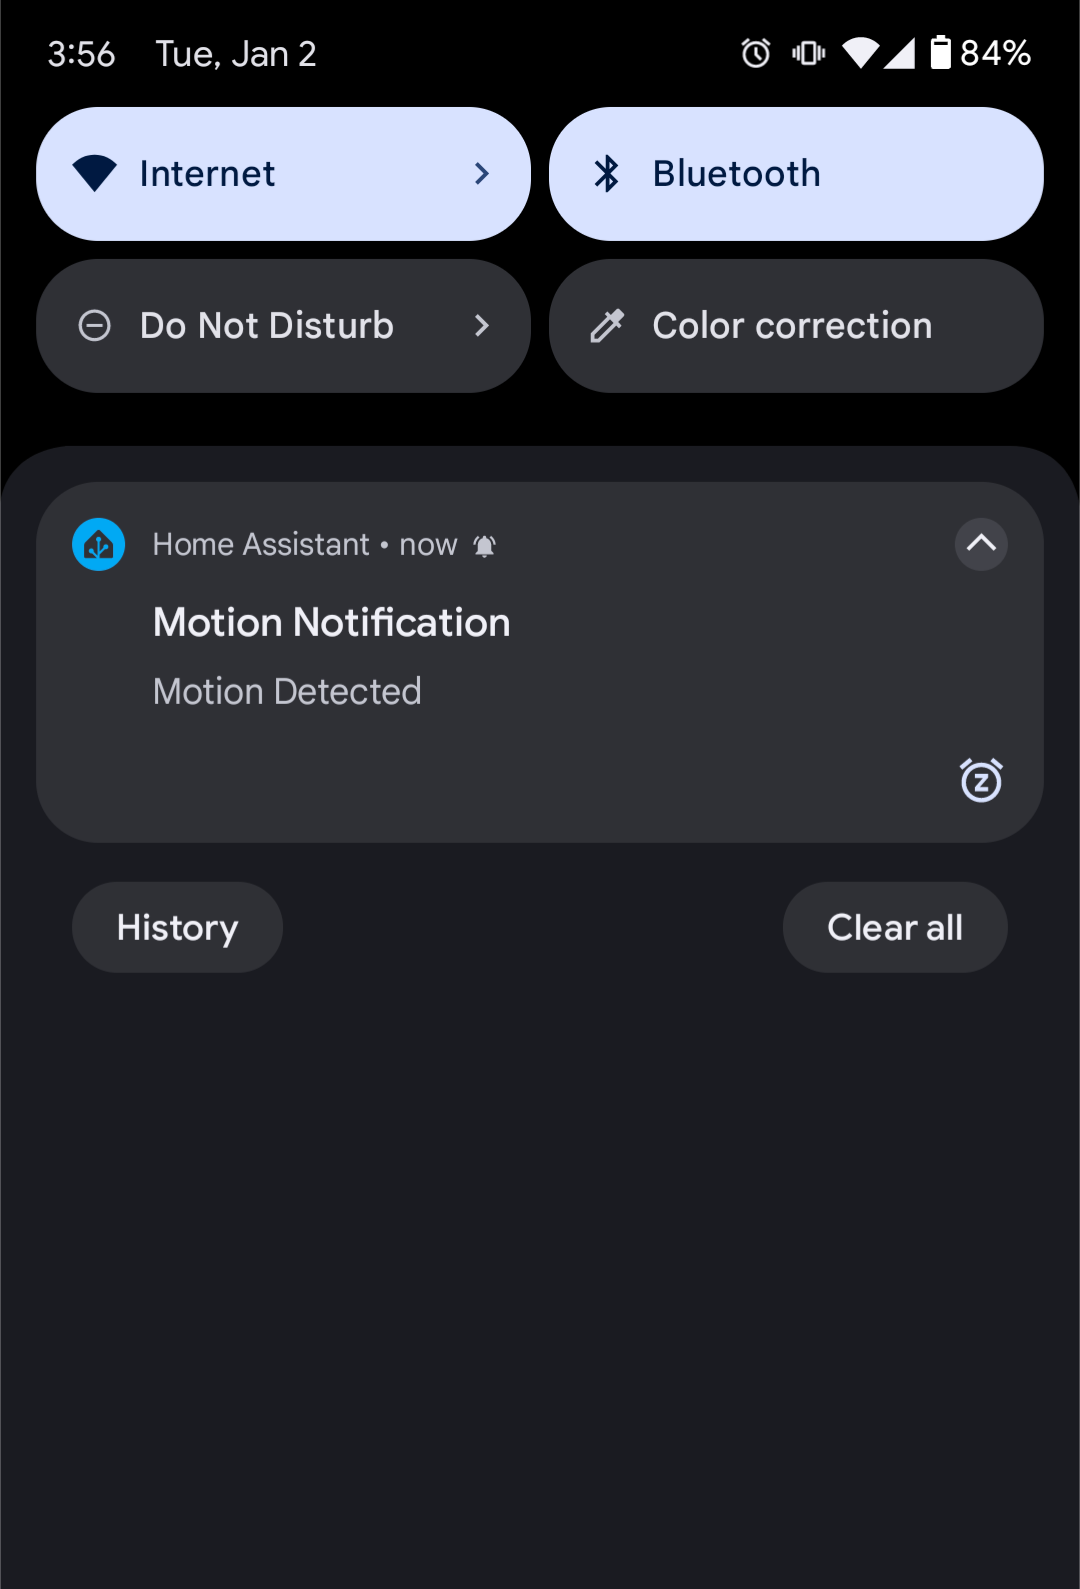
When this fires, my phone goes off:
How did it get in? Saving Recordings to Stream and Sending Links to me
Actual objective here: “I want to be able to watch the recording on my phone.” But as a Stream team member, I thought uploading them to us could be a “fun” (read: productive procrastination) way to achieve that.
Step 1: Motion settings for the video output
Here are relevant excerpts of Motion’s config file at
/etc/motion/motion.conf, with some notes.
# >>> Change this to "off" because systemd starts this service
daemon off

# >>> Make sure the `motion` group has write access
target_dir /videos

# >>> This was where my webcam mounted, but may not be for you.
video_device /dev/video0

############################################################
# Image Processing configuration parameters
############################################################

width 1280
height 720
framerate 30

############################################################
# Motion detection configuration parameters
############################################################

# >>> I tweaked these, may tweak more... the docs are good
threshold 600
minimum_motion_frames 3
event_gap 15
pre_capture 5
post_capture 60

############################################################
# Script execution configuration parameters
############################################################

# >>> See above!
on_event_start

# >>> Explained below; handles Stream and Webhook #2
#     "%f" is a placeholder for the full path to the mp4
on_movie_end /videos/uploader/video-upload.js %f >> /videos/on_movie_end.log 2>&1

############################################################
# Movie output configuration parameters
############################################################

movie_output on
movie_max_time 600
movie_quality 80
movie_codec mp4
Step 2: Uploading to Stream
I provisioned an API token on Cloudflare’s Dash for Stream to use in the script:
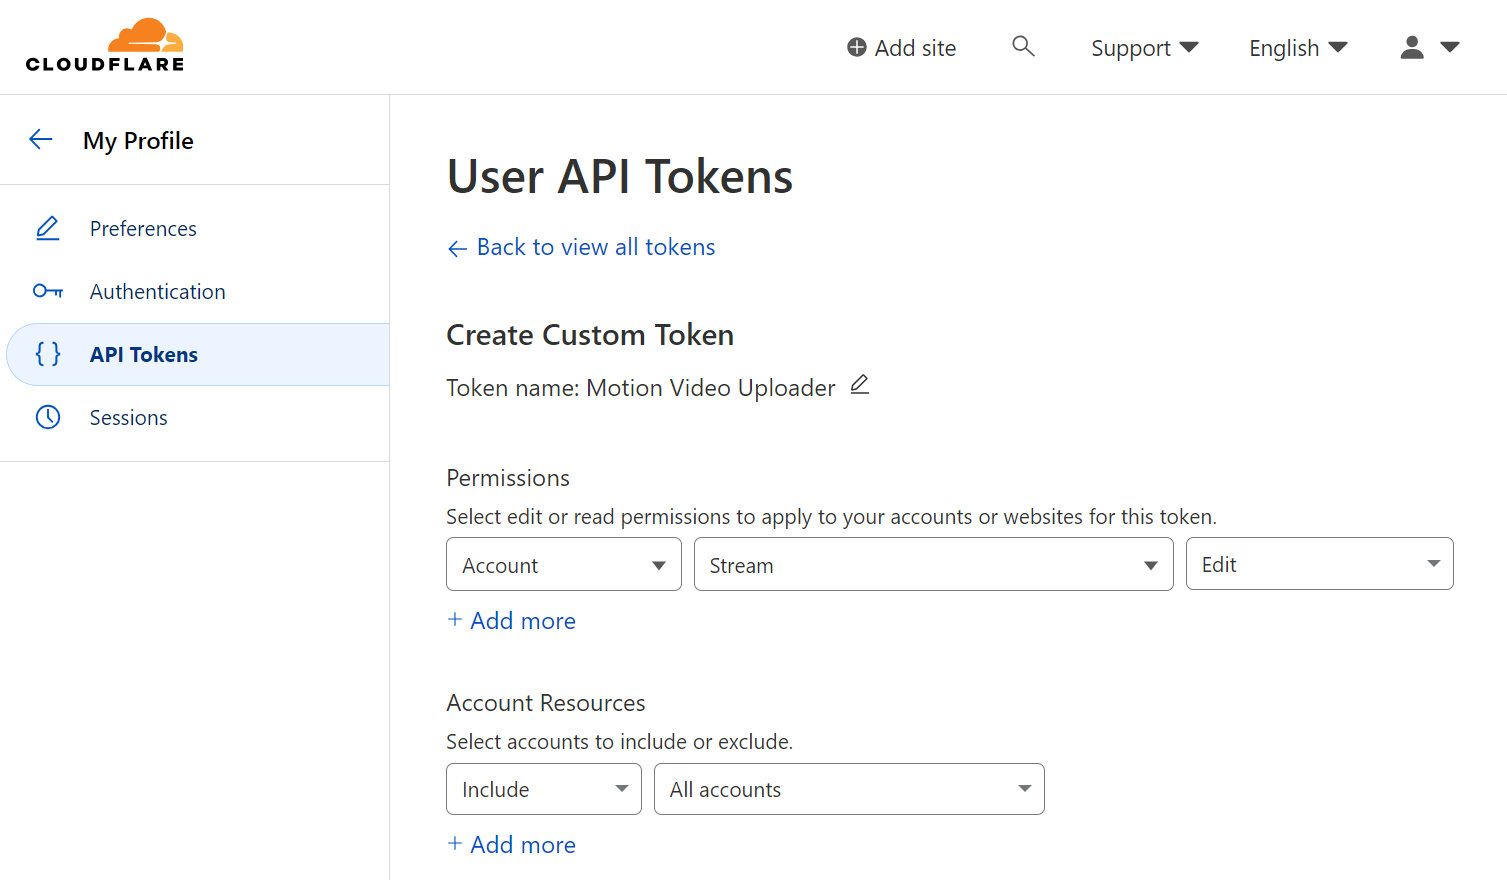
Some videos were too big to upload in a single request, so TUS was the best way to get them posted. To be honest, this was harder than I thought it would be — good user research.
After some trial and error, I settled on writing the uploader in JavaScript and
using tus-js-client. The Motion service
runs as its own account, so my usual recommendation of
“do all Node management with NVM”
led to many problems.
So I’ll say this just-this-once, for this use-case only, and never again:
# You almost certainly _do not_ want to do this in any other context.
sudo apt-get install nodejs node-npm
This library requires Node v18+, which is thankfully the default for Raspberry Pi’s Bookworm release.
The script is marked as an executable so it can be easily called from Motion’s
config file. Its only direct dependency is tus-js-client.
#!/usr/bin/node

const fs = require('fs');
const tus = require('tus-js-client');

// Take the path to the video file as an argument, get info about it
const path = process.argv[2]
const file = fs.createReadStream(path);
const size = fs.statSync(path).size;

// Use this to store the video ID when we know it
let mediaId;

// Determine a date one month hence to automatically delete the video
const deletionDate = new Date();
deletionDate.setDate(deletionDate.getDate() + 31);

console.log(`Uploading ${path} (${size} bytes)`);

const options = {
  // Stream upload endpoint
  endpoint: 'https://api.cloudflare.com/client/v4/accounts/YOUR_ACCOUNT_TAG/stream',
  headers: {
    // API token with Stream access
    Authorization: 'Bearer YOUR_API_TOKEN',
  },
  chunkSize: 50 * 1024 * 1024, // Chunk size of 50MB
  metadata: {
    name: path, // this will be the video's title in Stream's UI
    scheduleddeletion: deletionDate.toISOString(), // scheduled deletion date
  },
  uploadSize: size,
  onError: function (error) {
    throw error;
  },
  onAfterResponse: function (req, res) {
    // Capture the video id from the stream-media-id header and save it
    const mediaIdHeader = res.getHeader('stream-media-id');
    if (mediaIdHeader) {
      mediaId = mediaIdHeader;
    }
  },
  onSuccess: function () {
    // Report success to the local logs
    console.log(`Upload finished. Stream video id: ${mediaId}`);

    // Fire a webhook to Home Assistant with the link to the video
    const notification = fetch('https://home-assistant.server/api/webhook/video-uploader', {
      method: 'POST',
      headers: {'Content-Type': 'application/json; charset=utf-8'},
      body: JSON.stringify({
        'message': 'Video Uploaded',
        // Stream player URL is https://customer-CODE.cloudflarestream.com/VIDEO_ID/iframe
        'link': `https://cloudflarestream.com/${mediaId}/iframe`,
      }),
    });
  },
};

const upload = new tus.Upload(file, options);
upload.start();
Once it executes, the video is listed in Stream:
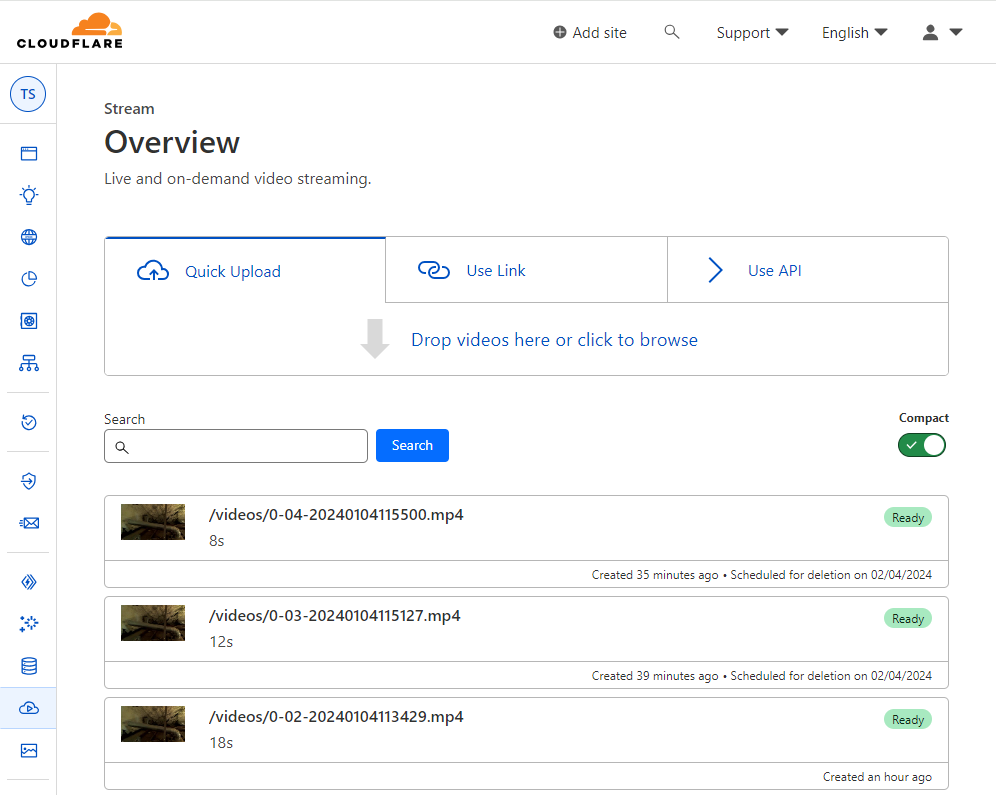
Step 3: Sending the URL to Home Assistant
Reviewing the script above, after the upload is completed, it fires a webhook to Home Assistant, which includes a link to the video in the payload.
So the inbound trigger setup is similar (just a new ID), but we’re calling two services this time:
Send the link to me: again using Home Assistant’s notify, but including
another property with a link to watch the video on Stream, which will be
surfaced by the app as a notification action.
service: notify.mobile_app_pixel_7a
data:
  title: Motion Notification
  message: "{{ trigger.json.message }}"
  data:
    actions:
      - action: URI
        title: Watch
        uri: "{{ trigger.json.link }}"
Gotcha: I didn’t see the nested data property when I first set this up.
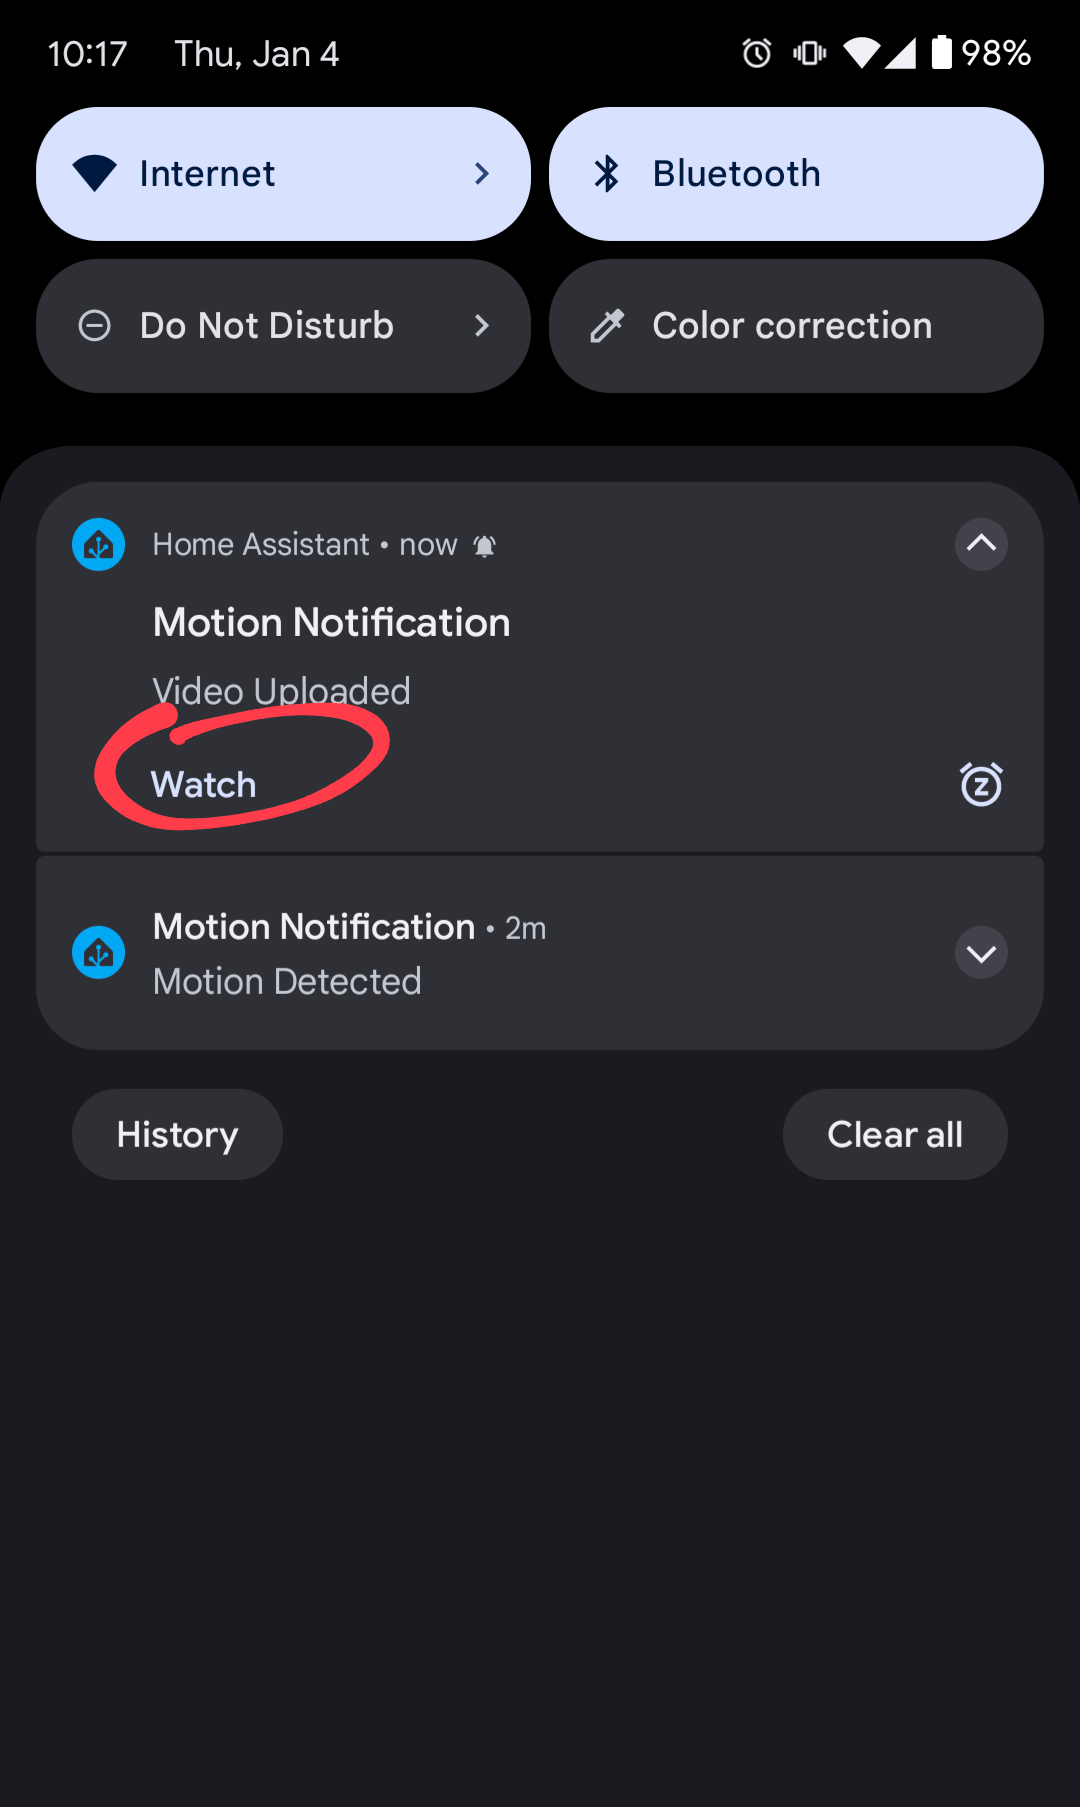
Actions have to go in data.data.actions[] as shown here…
This time, I get a notification with a “Watch” button:
Save the link to a “Shopping List”:
which is, oddly, the only built-in way to create a Home Assistant
To-Do List (which cannot be
used directly?). Create the Shopping List first and use its entity_id in the
todo.add_item target.
service: todo.add_item
target:
  entity_id: todo.video_upload_list
data:
  item: "{{ trigger.json.link }}"
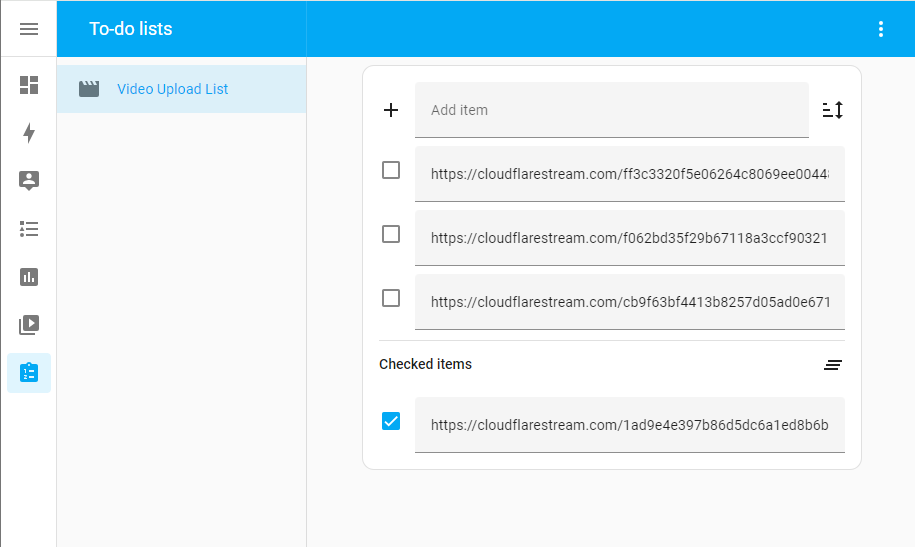
This way I can go back and get the link later if I miss the notification.
Okay… so did it work?
Unfortunately. I woke up to several notifications a couple days later. In total, it has captured five separate clips across two… “incursions.”
Looks like it might just be one critter, potentially entering near the HVAC coolant line… I wonder if the lights I’ve left on around the camera are a deterrant, but I don’t have an IR camera. (And would prefer not to have a reason to buy one.)
I’m not sure the next steps need to be documented.
* Disclaimer: I am a Cloudflare employee, so some of our products are made available to me for free, including Stream and Tunnels (which I use for Home Assistant ingress). This is not intended as security guidance. It is also not the company’s recommended approach for dealing with rodents.
** And no, I don’t intend to kill it.