
Thanks to the fantastic 3D Printing Subreddit and my friend George Louthan (of roadtrip fame), I became convinced of two things: first, that I needed a 3D printer in my life; second, that the Monoprice Maker Select V2 was a good entry point because it was an inexpensive but well-reviewed printer.
The First Days
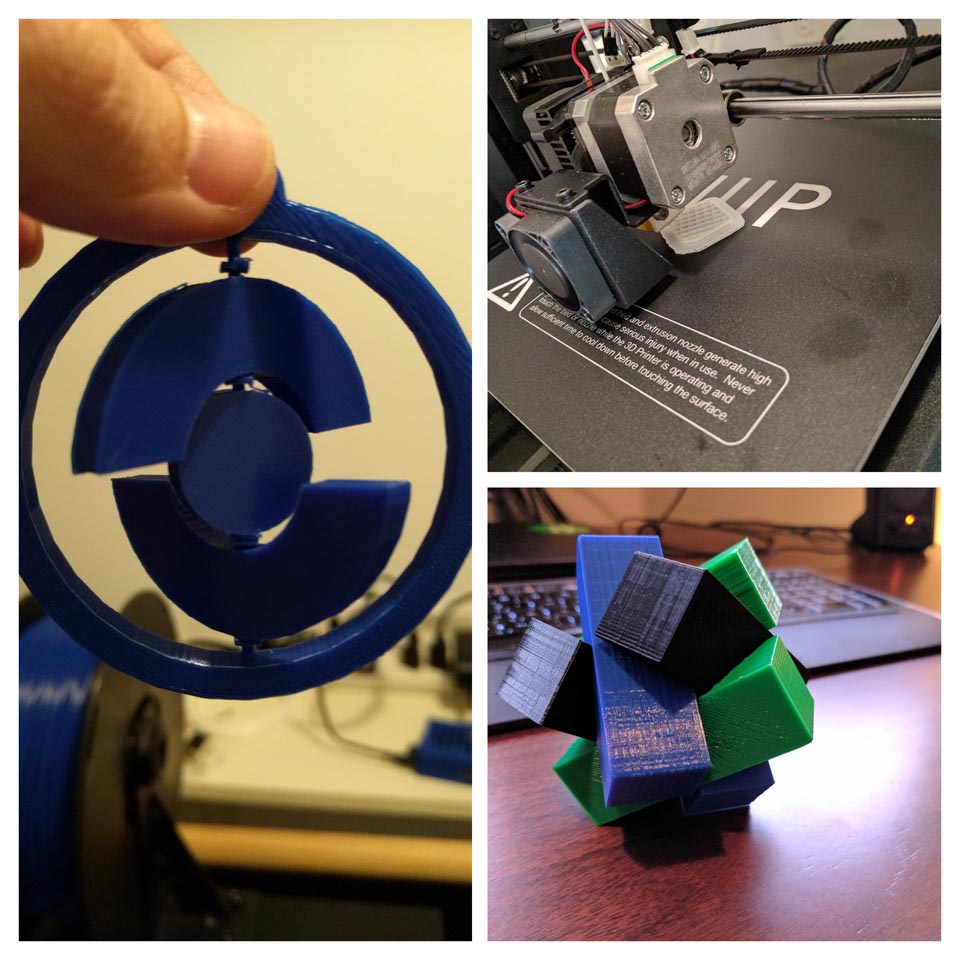
I jumped into Thingiverse and started printing little trinkets that others had designed. This helped me see what was possible, what kinds of prints were easy or difficult, and how to optimize settings for A) the printer generally and B) individual models specifically.
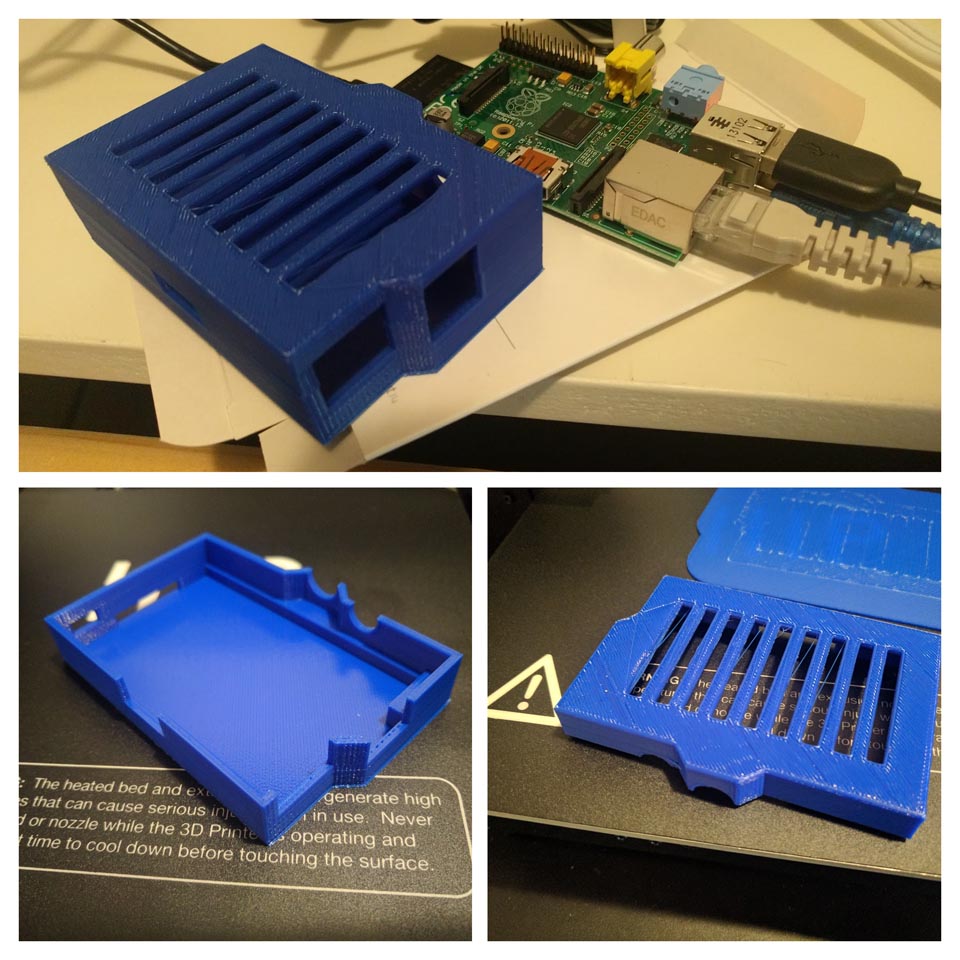
Raspberry Pi Case and OctoPrint
I started using OctoPrint to manage the printer instead of loading files from the SD card. My first print from OctoPrint was a case for the Raspberry Pi B+ I was using to host it.
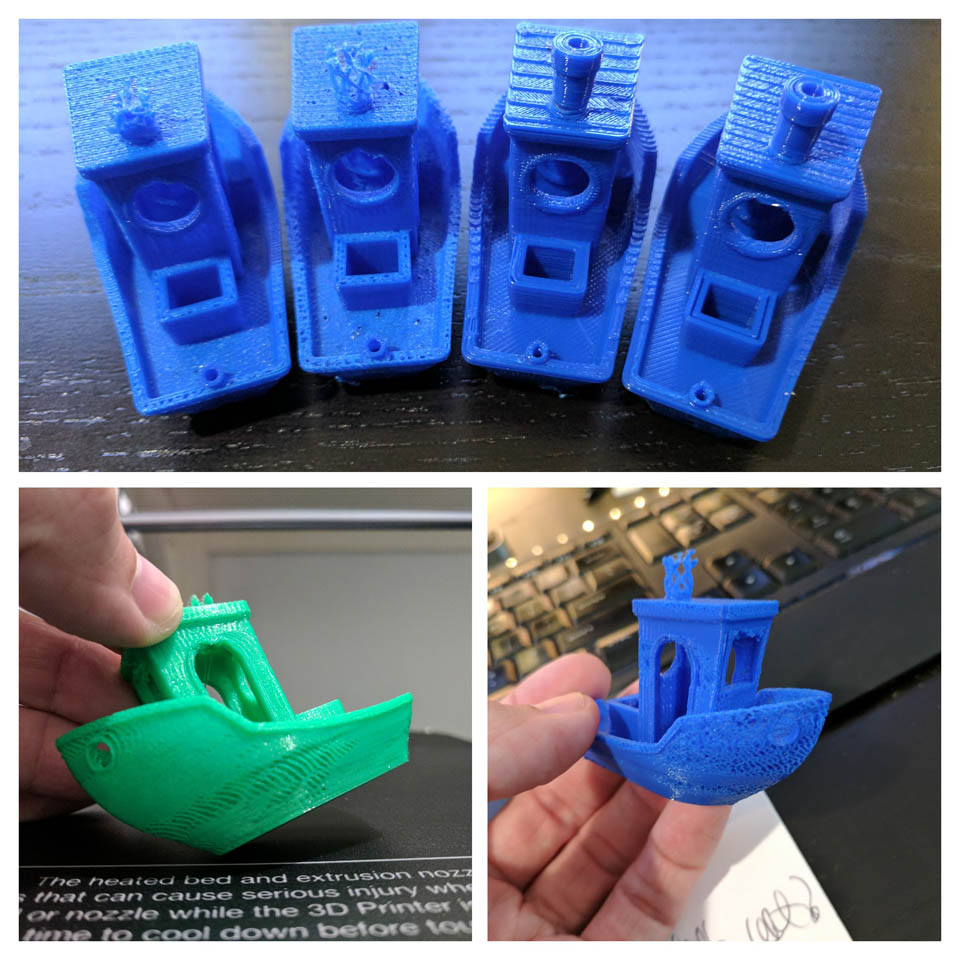
Benchy
Because of course I did this. Printing the “Benchy” is apparently a rite of passage; it’s a wildly popular but tricky model to print correctly, so it’s useful for diagnostics and finer optimizations. I had under extrusion problems across the model which I worked on and resolved.
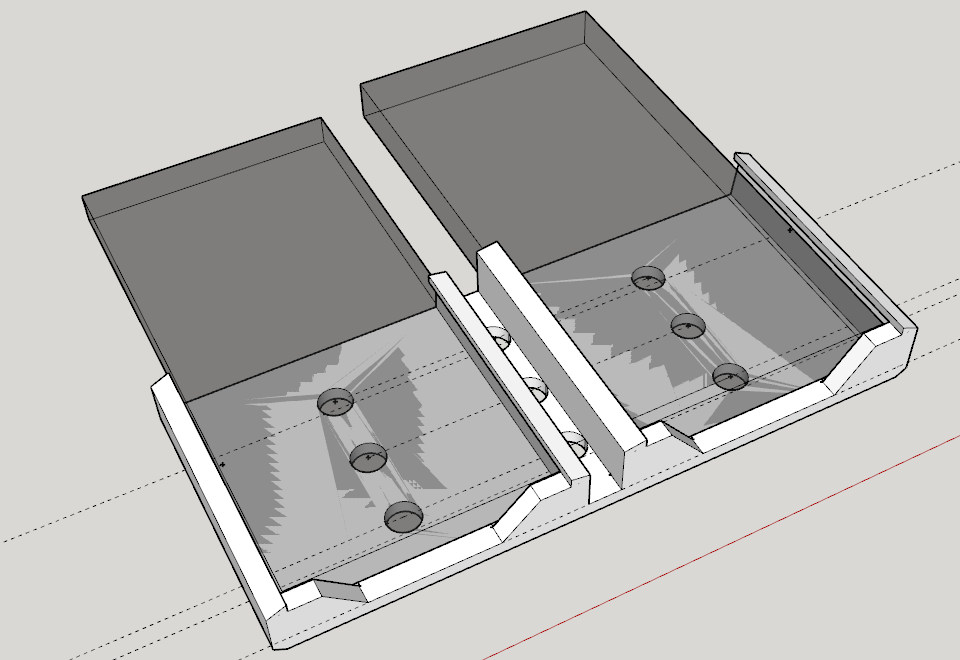
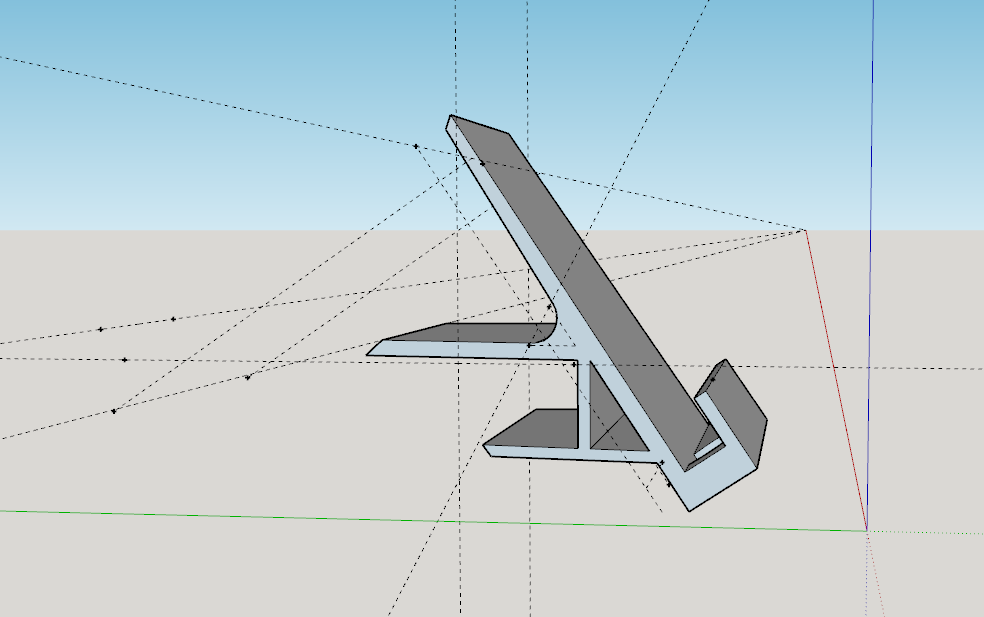
Functional Prints
Most of my printing this year took the form of “if you have a hammer suddenly everything looks like a nail.” Proudly, I set out to solve my world’s problems with plastic doodads, mostly designed using SketchUp.
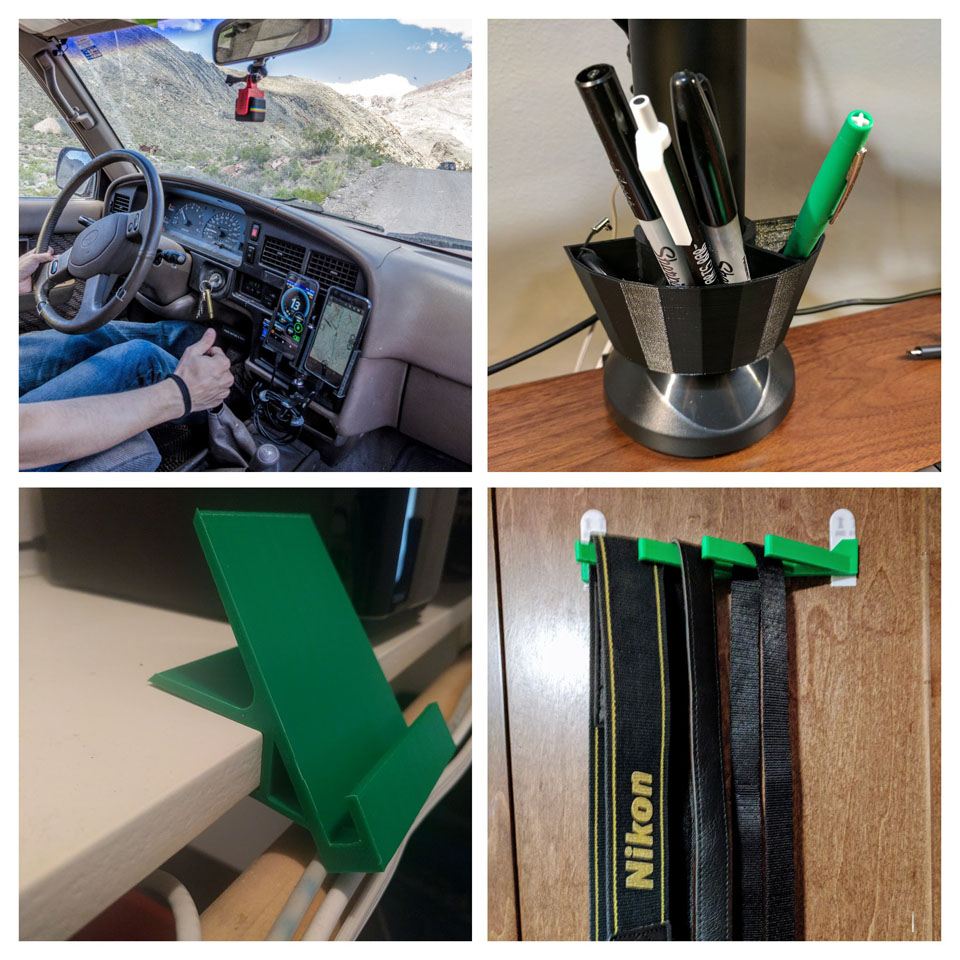
Pictured here:
- Polaroid Cube mount to attach to a GoPro suction cup mount
- A dual-phone mount for a Google Pixel and Nexus 5X for the roadtrip

- Pencil cup that attaches to a monitor stand
- Tablet stand for the 3D printing area which shows the OctoPrint interface

- Camera strap holder for the cabinet I keep photography stuff in
I also printed cable runners, desktop stuff, memory card cases, and little display mounts for memorabilia.
Bigger Projects
I have a few notable 3D printing projects from this year.
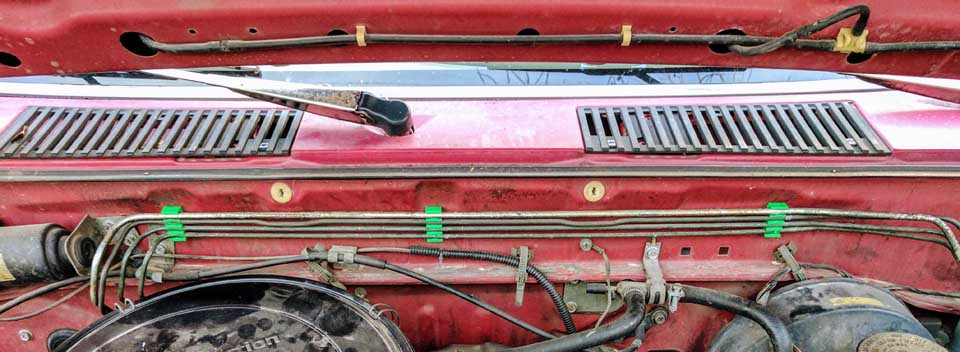
The Brake Line Holders
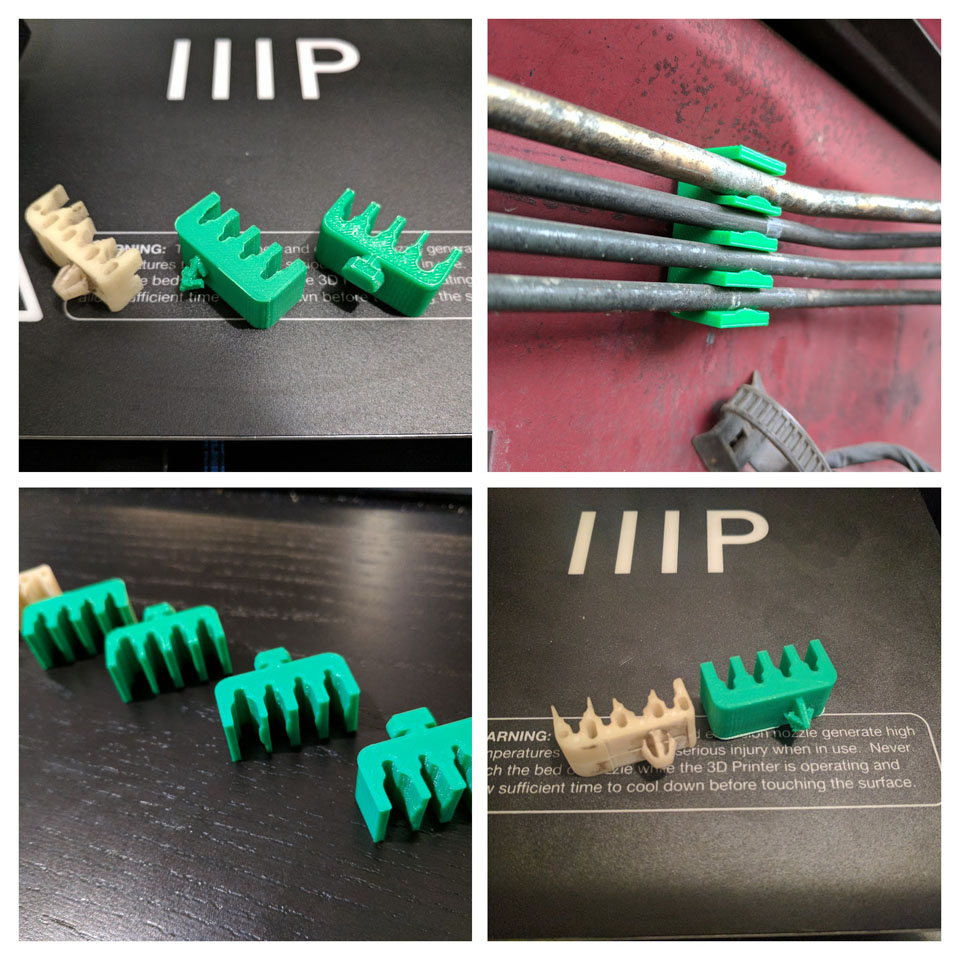
I have an ancient pickup that needs a little love. One easy problem: the brackets that hold some hydraulic lines had broken. With calipers and many rounds of revisions, I printed a set of four that twist into the hole in the engine bay wall that will retain those lines in place.
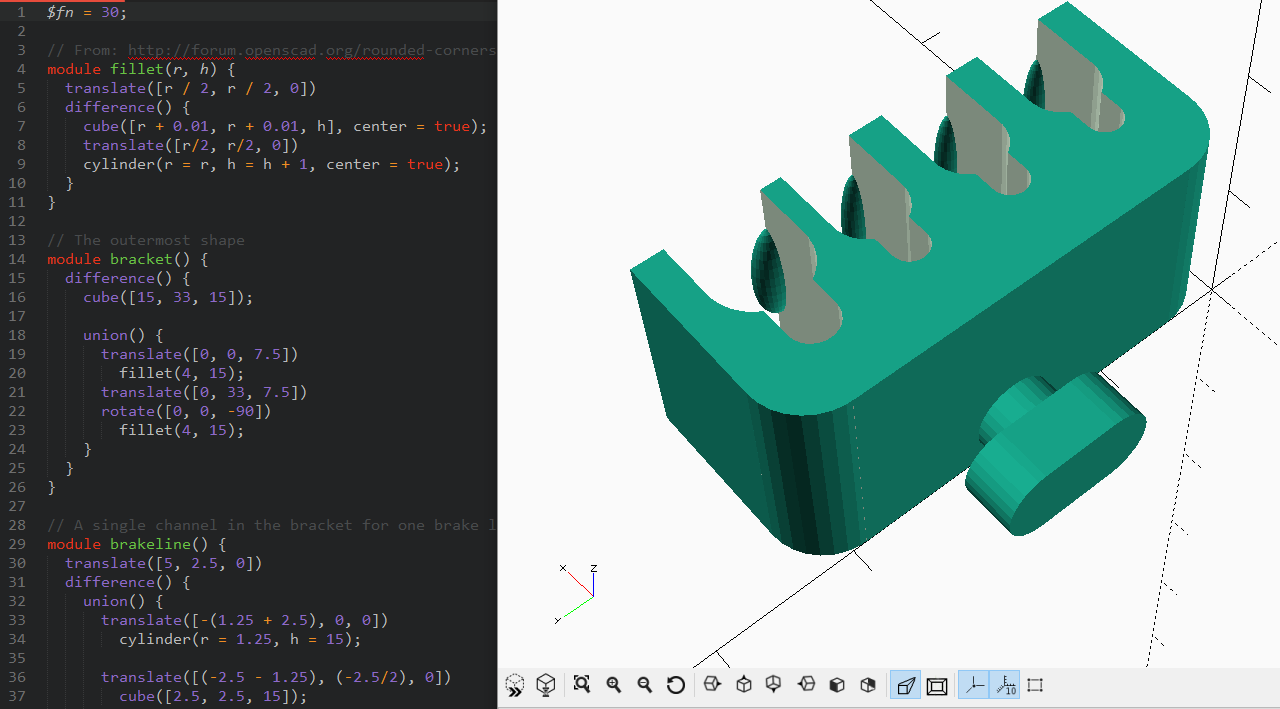
This was the first time I used OpenSCAD, and I pushed the project to GitHub. I enjoyed being able to use code to build this because it is mathematically precise and repetitive. Building this with a visually-driven tool would have been frustrating. Also, source control for versioning is convenient. I appreciated not only that GitHub will visualize STL files in the repo with an interactive 3D viewer, but individual commits or PRs will show <span style={{color: “#00cc00”}}>additions and <span style={{color: “#ff0000”}}>deletions to the volume:
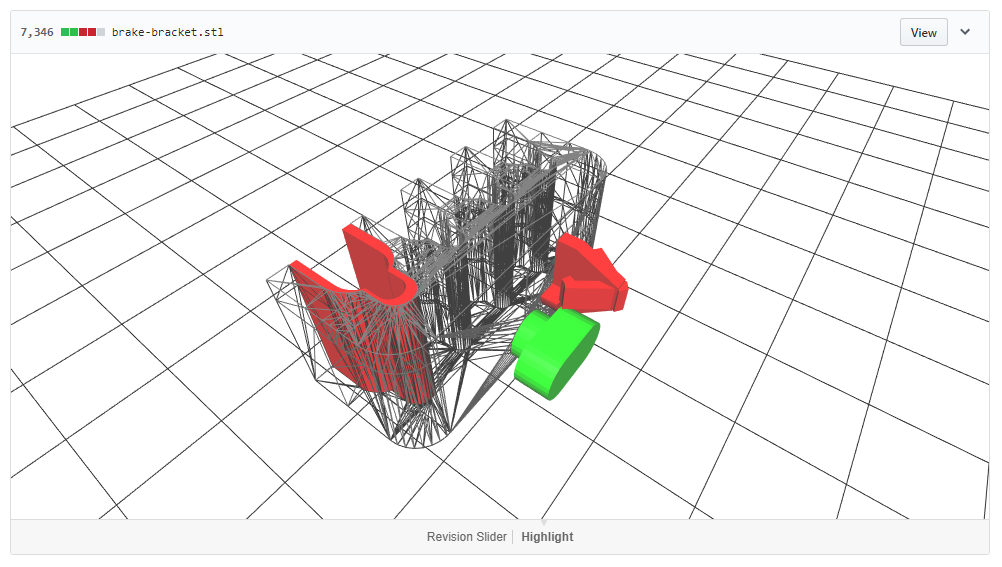
This commit enlarged one channel and replaced the clip (which worked with the original nylon part but not in PLA) with a solid piece that twists into the wall.
PLA isn’t an ideal material for this purpose because it’s brittle and heat intolerant but I was prototyping these in winter and they survived a Texas summer, still in place almost a year later with no distortion.
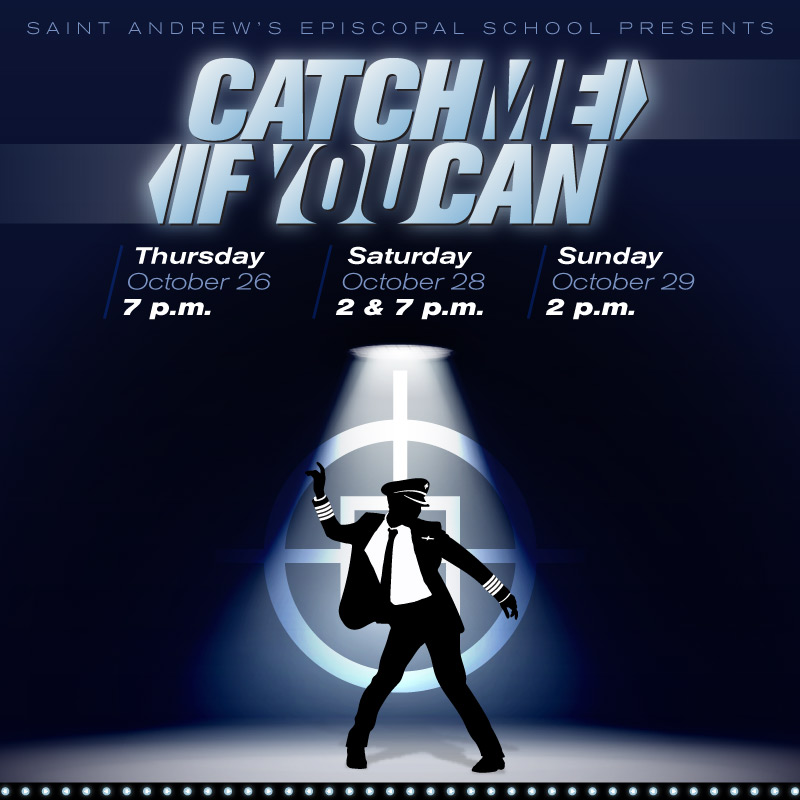
Theatrical Props for Catch Me If You Can
Each fall, I do graphic design for the high school fall musical at St. Andrew’s Episcopal School. This year, they performed Catch Me If You Can, a musical based on the movie based on the autobiographical novel by Frank Abagnale, Jr. about his string of fraudulent escapades which included flying for PanAm.
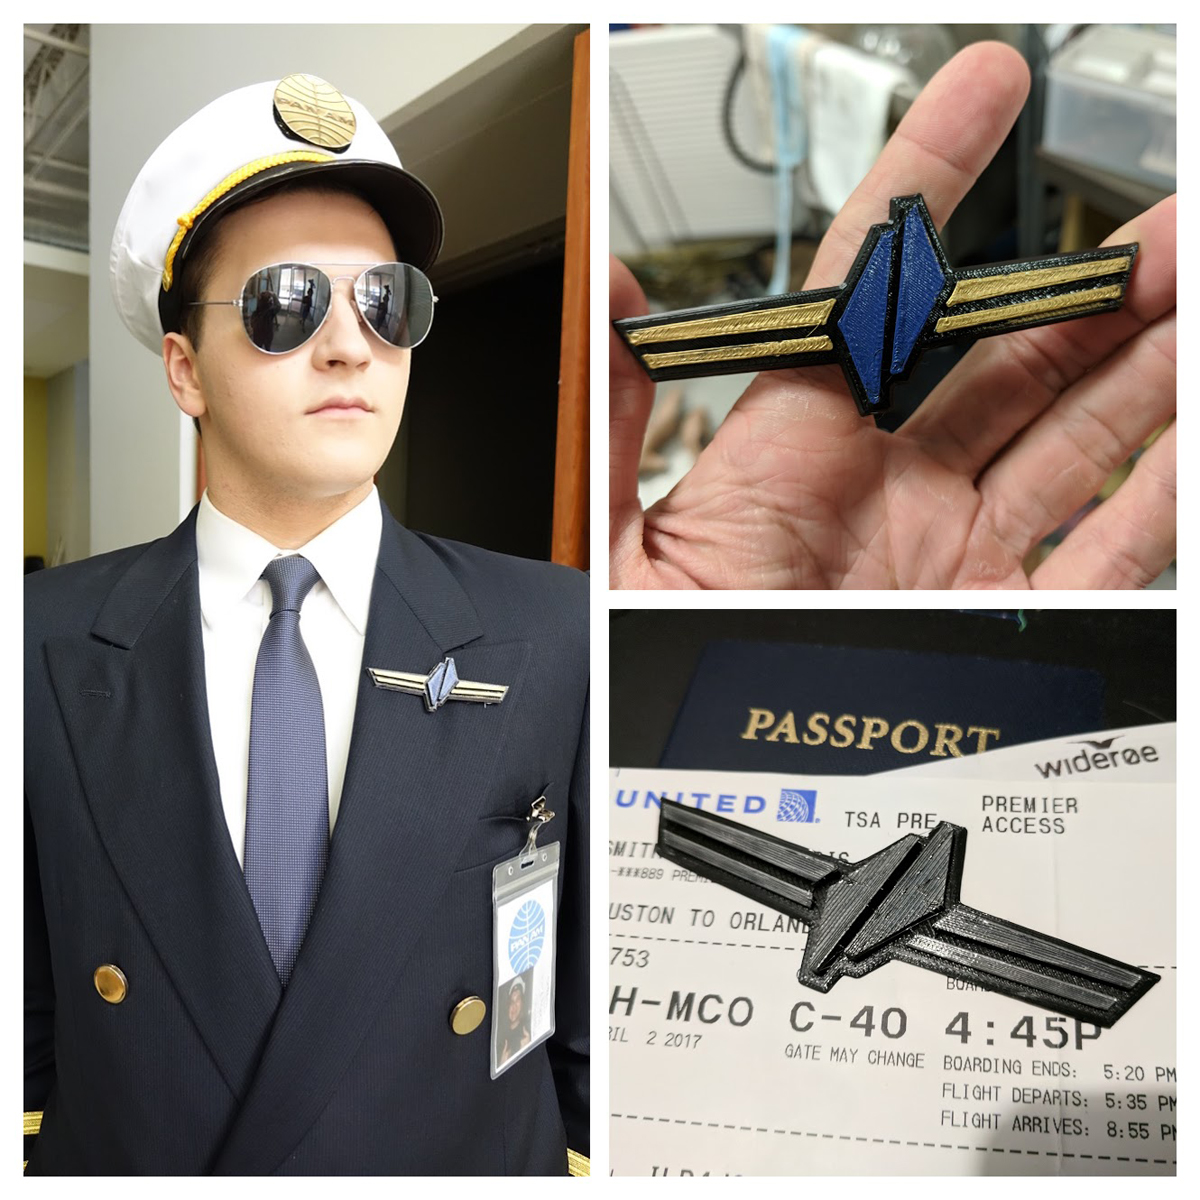
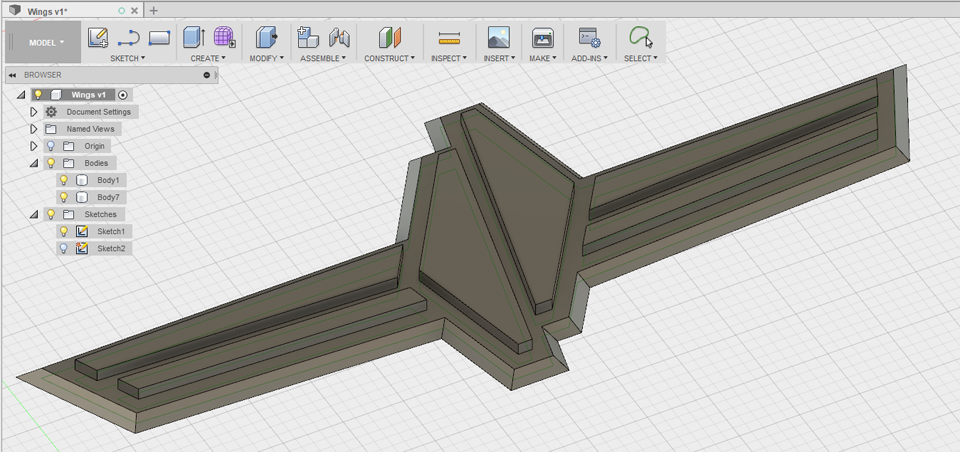
The costume designer couldn’t find affordable PanAm pilot wing pins. I mentioned that I might not be able to replicate the vintage pins but that I could produce plastic ones modeled after the illustration I used in the poster.
This was awesome. Beyond a printed piece, which I make frequently, this felt like a more substantial physical output from my graphic design work. Further, theatrical costumes/props often exaggerate sizes or relationships for visibility. Original pins would have been barely visible, but the extra-large ones we printed read naturally on stage. They were printed in black PLA which the costume designer painted with model paints.
Getting an SVG from Illustrator into SketchUp requires either buying the premium edition of SketchUp or jumping through intermediary applications to do multiple file type conversions. I did the first round with SketchUp using the now-defunct 123Design for the SVG import. I did the final version with Autodesk Fusion 360 instead. It is much more reliable with STL export and natively supports SVG imports. It’s also free for hobbyists!
I find it less flexible with shape building than SketchUp, but I’m also very new to it. SVG import is great. I really dislike that it runs “in the cloud” and makes it nearly impossible to just store things locally. I’m working individually so having an application that can run locally/offline as well as let me store working files alongside my STL and GCODE exports would be preferable.
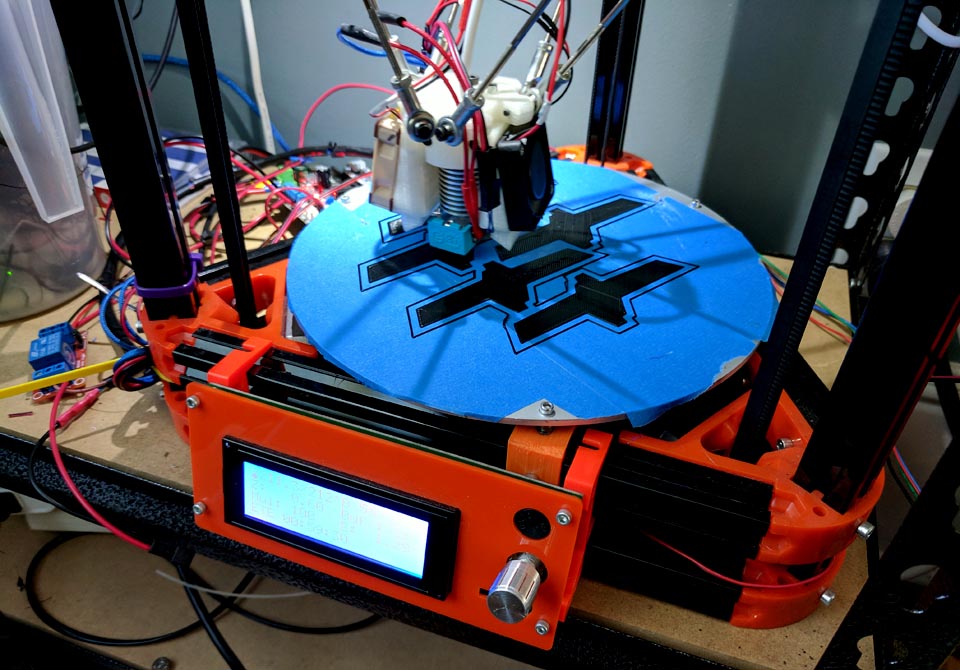
Shoutout to George for helping me bulk-print these with his delta printer because—
Then it Broke or “Do the Mosfet Mod”
Despite looking at modding tutorials for the Maker Select, I never stumbled upon the Mosfet mod until it was too late. While printing a prototype of the pilot wings, I suddenly smelled dying electronics, and just as quickly it was without power. This is a known design flaw of the Maker Select as well as the numerous printers which are also derived from the Prusa i3:
Power for the heated bed runs through the printer’s main board which shouldn’t handle that current and out to the bed via connectors that cannot handle it. The Mosfet kit adds an additional board with traces and connectors rated for the heated bed power requirements. It uses the connection to the main board to activate a relay. This keeps the “big current” on the Mosfet board with only minimal needs running through the main board to activate the relay.
Thankfully, I was still under warranty so I sent the printer off to Monoprice for repair. When I received it back, I saw that the new board had better connectors but didn’t appear to have a beefier channel for that power to run through, so I installed the Mosfet upgrade by following the excellent guide by Brett at Let’s Print 3D.
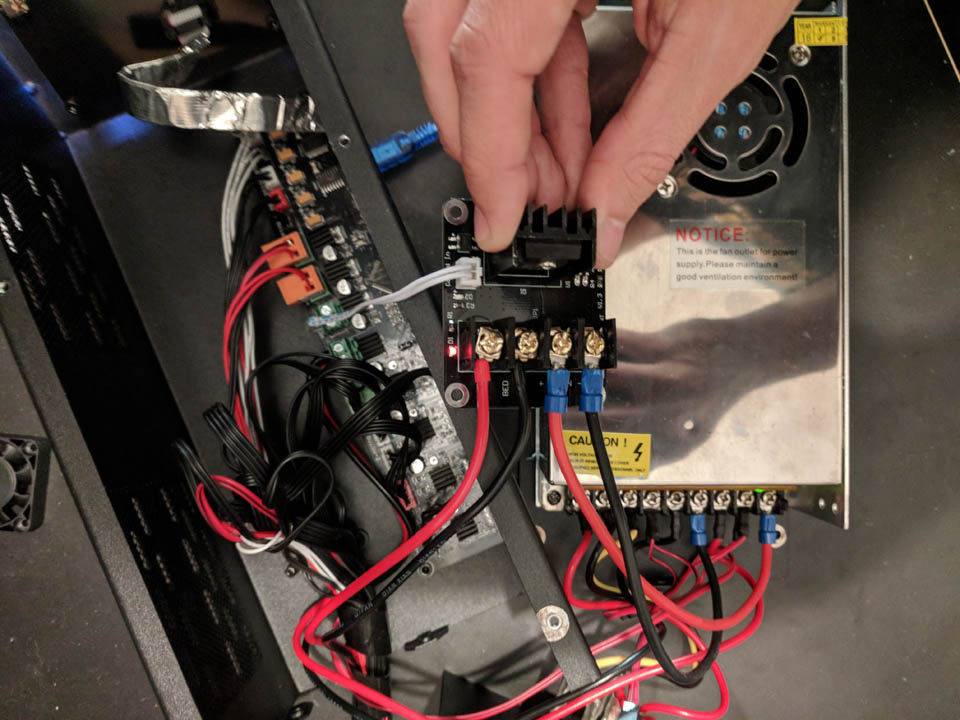
I may need to make the cables from the PSU to the Mosfet board longer because I don’t think I can put the case back together as-is, but this is connected and working properly
A Retro
What went well in 2017?
- Started from zero experience with 3D printing
- Created a lot of moderately intricate widgets which were useful
- Learned more about SketchUp (which I had used previously in theatrical design)
- Got an introduction to OpenSCAD and Fusion 360 as alternatives
- Used 3D printing to solve a theatre problem
- Fire hazard aside, the Maker Select was a great entry point for me
What to change in 2018?
I was not adventurous with modeling, and have only minimal experience with design applications outside of SketchUp. Further, my primary use for the printer was to build utilitarian things, so while I’m proud of the forms I created, those ideas didn’t come from a visually creative mindset. Now that I have a printer that is less likely to catch fire and I’ve done a survey of 3D printing basics, I’d like to design more creative/decorative models with other applications and possibly different materials.